
Preface: Build a site with WordPress
Having a business without a website is almost meaningless these days. Every business or even an individual is looking to have a website with a beautiful appearance and of course high efficiency. To have a website, you can leave everything to a designer and programmer. But without a doubt, it will cost you a lot. If you want everything to be personalized and have a clear business identity, then it is better to leave the work to Kardan. But if you are looking to do it yourself then you should go to a site builder. One of the most popular content management systems is the WordPress system. Building a site with WordPress does not require that much coding knowledge and you can design a WordPress site yourself. Of course, if coding knowledge is added to this CMS, nothing will be lacking. Most interestingly, WordPress is a completely free and open-source platform.

WordPress site design
On the official WordPress website, there are many free plugins and templates available to users. If you plan to use paid plugins or templates, all you have to do is pay. Like everything else, creating a WordPress website is essential. In this article from WordPress Partner, we are going to see how to design a WordPress site using this powerful CMS. be with us.
It’s the power of Microsoft Word with the intuitiveness of an iPhone.
There are many content management systems available for launching a website, some of which have advantages over others. WordPress is a content management system consisting of a wide variety of templates and skins that are provided to users for free. You can set up your site without any programming skills.
Programming skills are one of the things that people think they can not do on the Internet without this skill, but the content management system has allowed people to easily start their own Internet business without the need for a background in programming. Of course, this system is suitable for people who also have programming capabilities, and users can do any personalization on their website by coding and own a professional website.
Another feature of WordPress is that it is open-source, which means that this system provides you with free resources. In fact, you can fully use WordPress resources at no cost. In this course, we will explain how to build a site with WordPress. But let’s know more about WordPress…
Build a site with WordPress
To build a site with WordPress, you need to prepare a few basics in advance:
- Hosting: As you know, hosting is the space that hosts the content of your website. Just do a Google search for the word hosting and you’ll see a list of service providers. We made it easy for you and gave you enough information about WordPress hosting .
When shopping for hosting, make sure that the service you choose supports PHP version 7.3 or higher and MySQL version 5.6 or higher, as well as HTTPS.
- Domain: A domain is the name and address of your website. This name is generally the name of the person or business associated with the target.
After purchasing these two items, you should go to the WordPress installation.
Download WordPress
To design a WordPress site, we must download and install WordPress. To download the WordPress installation file, go to the official WordPress website. Here you can download the latest version of this CMS for free. After downloading this file, decompress it. Now we need to install and set up this file so that we can complete it and turn it into a site. But there are different ways to do this.
Install WordPress manually
When it comes to installing and then designing a WordPress site, users have two options. Install WordPress locally or enable it on a server. Here we will examine the installation of WordPress as a local host first of all. Because you all always need to install the site on a test and virtual environment. So it is better to know the way completely.
Install WordPress on localhosts
Localhost means the computer on which a program is running. Simply put, the localhost simulates server space on your computer. Access a real, expensive server without the need for it. In the method of installing WordPress on localhost, you do not even need to buy a domain and a host at first. You can buy these two after launching the website and transferring it to the server. Although we have already provided training on how to work with this part, here we still want to clarify these issues again.
Step 1: Download and install XAMPP
The first step is to install XAMPP software. After downloading the file, open it to install the program. If you are using antivirus on your computer, you will get a message similar to the image below.

We see this message if antivirus is used
In response to this message, click Yes. After clicking Yes, you will see the following image. Seeing this image puts you at the beginning of the XAMPP installation process.
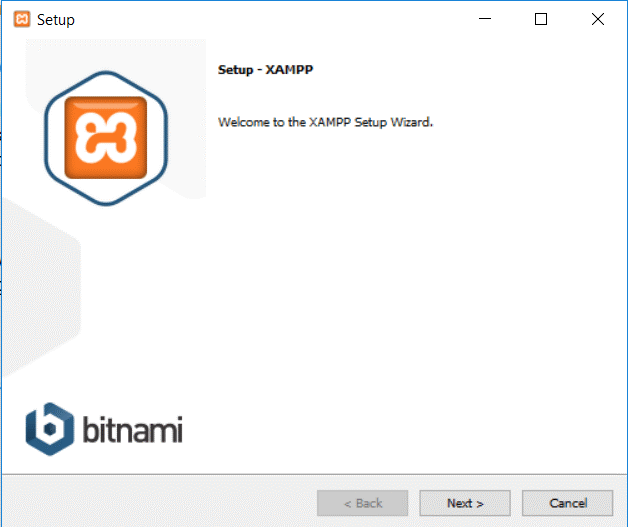 Start the Xampp installation process
Just click Next to continue. The next step is to select the program components to install. To install WordPress on localhost you only need two options MySQL and phpMyAdmin – check these two options.
 Mark MySQL and PHPMyAdmin
Since other components of the program are not needed, check the remaining options. Finally, click Next. In the next step, you can select the software installation folder. We suggest you use the default folder and go to the next step without change – click Next.
 Select the software installation folder
After this step, you will be asked if you plan to install Bitnami as well? You do not need this program to create a WordPress website on Local. So just uncheck this option and go to the next step.
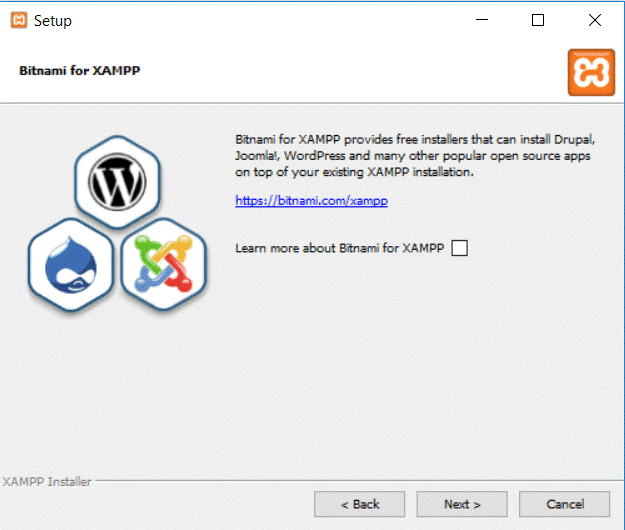 Confirm and go to the next step
Click on Next The software is ready to build a site with WordPress.
 Your zip is ready to install
Depending on the power of your computer, software installation may take several minutes.
 Take time to install
After installing the software, you can run the program by opening the Control Panel.
 Complete the installation process
So far you have only installed XAMPP.
Step 2: Start XAMPP and test the server
The second step is to start XAMPP and test the server. To install XAMPP and WordPress you need two main options:
- ApaMySQL
- Apache
To start these two options, you must click on the Start option from the XAMPP control panel.
 Enable two options MySQL and PHPMyAdmin
After starting these two options, you can see that their color has changed to green. This means that both modules are enabled.
Now it’s time to see if your localhost is working properly. All you have to do is go to http: // localhost / using the browser. If you have done everything according to the instructions so far, you must have entered the Zamp counter. Now you have the WordPress site design platform. This ball and this field!
Step 3: Add WordPress files
The next step in building a site with WordPress on localhost using XAMPP is to add WordPress files. To do this, you must first download the latest version of WordPress from wordpress.org.
After downloading WordPress files in the Windows environment, go to the XAMPP installation path. Since we have not changed the default installation path, you should go to C: // xampp. Look for htdocs in this folder.
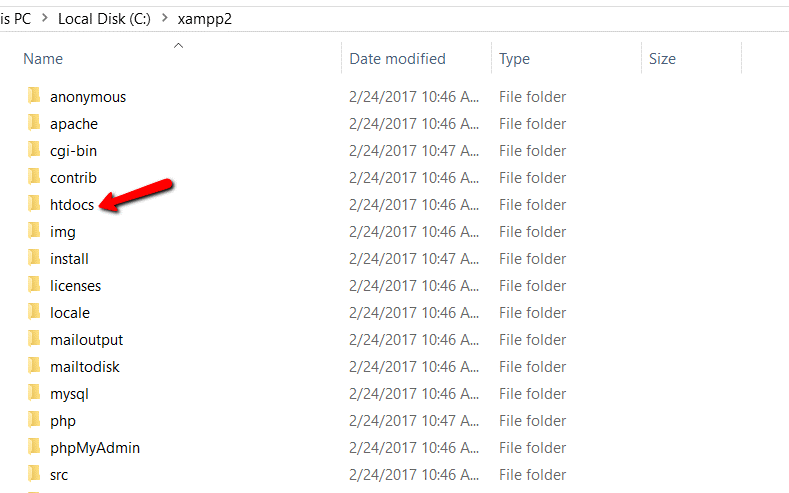 Installation and commissioning location
Create a new folder for your site in this folder. The name of this folder appears in the link of your localhost. For example, if you select the folder name test site, you can access your site using the link http: // localhost / testsite. After creating this folder, you need to decompress the WordPress installation ZIP file in it.
Step 4: Create a WordPress database
The fourth step is to create a database for WordPress. It does not matter whether you install WordPress on a server or use the localhost. You need a database anyway. To create a new database from the XAMPP control panel, click on Admin in front of MySQL to navigate to the phpMyAdmin environment.
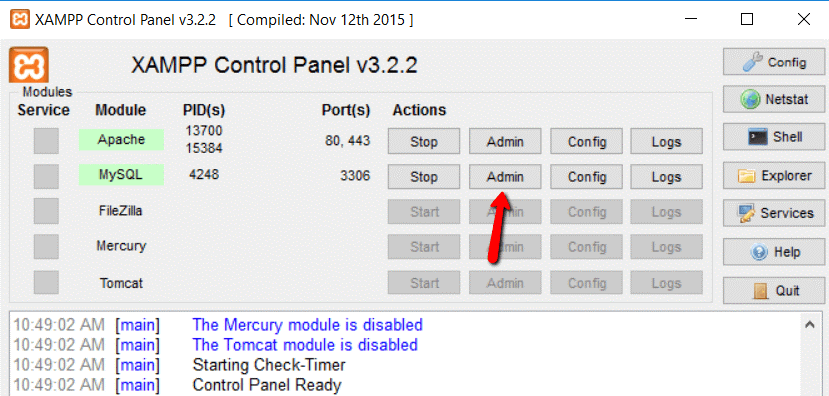 Access phpmyadmin
Then click on Databases at the top of the page.
 Create a database
Next, you need to choose a name for your website database. This name can be anything. Just choose a name that you can easily remember. Because in the next step of building a site with WordPress, you need it. Then click Create.
 The database was created completely
Unlike installing WordPress on a server, installing WordPress on localhost does not require creating a user for the created database after creating the database.
Step 5: Install WordPress
The last step is to install WordPress. When you go to the local URL of your website, you will see the usual steps of installing WordPress. The only difference between the two is the database information. When you have reached the stage of entering database information, enter this information:
- Database Name: The name of the database you created in phpMyAdmin.
- Username: Enter root for username.
- Password: Leave this box blank.
The rest of the steps are similar to the usual WordPress installation. After completing the installation process, your website will be launched on the localhost.
WordPress Theme
The appearance of a website is one of its influential factors. After installing WordPress, it is time to choose a suitable template for building a site with WordPress. As we said, the official website of this CMS contains an archive of templates and plugins supported by WordPress. Some are free and some are paid.
To install a new template, just log in to WordPress. Then go to Appearance – Themes from the WordPress dashboard. Here you can add a new template to WordPress by clicking Add New.
Do not forget that the appearance of a website represents the business and the person. So if you are looking to design custom templates for WordPress site design, visit the Jacket website. If you are looking for Persianized templates in WordPress, you can get free WordPress templates completely Persianized.
Necessary steps after installing WordPress
After you have installed WordPress, you should go to the installation of some useful and mandatory plugins. These plugins improve the performance of the website. Here are some of these plugins.
Akismet
The first plugin you should download after installing and activating WordPress is the Akismet plugin. This plugin is used to identify spam content and views. The job of this plugin is to distinguish between real and fake views.
Yoast SEO
Yoast SEO plugin is one of the top WordPress SEO plugins. With this plugin, you can completely optimize your website. Both in terms of content and structure.
Building a site with WordPress is not just about installing it. The main thing starts when you plan to upload content to your website. If you are looking to produce valuable content and rank high in Google rankings, you are the best choice.
W3 Total cache
As a plugin to optimize website performance, the W3 total cache plugin has been designed and developed to improve website performance, speed up loading, and activities like this.
UpDraftPlus
UpDraftPlus plugin is one of the most popular plugins for backing up the WordPress website. With this plugin, you can easily back up all the content of the website and upload it to Dropbox, Google Drive, and..
Now that you have the required plugins and the right template installed on WordPress, it’s time to create your first post in WordPress.
Log in to the WordPress dashboard to do this. Then go to Posts >> Add New Post. To open a new post in the editor. Here you can add title, content, images, and to the post. Then publish it from the blocks next to the editor.
Analyze your site
Another thing to do after installation is to connect the website to the Google Analytics service. Why is Google Analytics an important tool for webmasters? Let us answer this question by referring to the details. When you start a website, your goal is to grow your business. Presence in the world of the internet is necessary to attract the attention of internet users and turn them into potential customers. All this is possible in order to have high website traffic. This means that the more traffic your website has, the better your chances of getting a regular audience.
On the other hand, in order to monitor the activity and presence of users on your website, you need a suitable tool. This is the Google Analytics tool. Google Analytics gives you every detail about your website. This data will help you to take a more appropriate approach and reach your goals sooner.
Google Analytics registration tutorial
To use this Google service, you must first register in it. How to register in Google Analytics? As we mentioned, Google Analytics is a completely free service and tool. To use this tool, all you need is a Google Account. A while ago, we fully explained to you the method of registering in Google Analytics and registering the site.
Install WordPress on hosts
Whenever you decide to leave the test environment and move to the real environment to design a WordPress site, you can buy a host and domain and follow the installation steps according to the WordPress installation tutorial on the host. Installing it is exactly the same as installing it on the localhost, even easier and better.
So that we do not take your time and do not get bored anymore, we leave it to you to read it in WordPress.
Conclusion
If one day you decide to have a site, you have to choose two methods for yourself. One is that you can look for a professional who can set up a site for you and get paid for it, or you can learn and set up a site yourself. If you decide to do it yourself, be sure to try how to build a site with WordPress. Designing a WordPress site is not a difficult task at all and you just have to be a little creative and tasteful to learn and execute the steps correctly. All the facilities are available to you, just get to work. If you are looking for a complete tutorial, I suggest you read the WordPress tutorial and WooCommerce tutorial.
ABOUT US
Working with Digital marketing, SEO services, and website design and Migrating services to PWA with a highly experienced team for years, َAvenger IT Next Generation has been able to meet the needs of people in various businesses and help businesses grow. Continuously updating their level of knowledge and exploring different markets has surpassed the pioneers in this field and incorporate successful experiences into their careers.
Avenger IT Next Generation is a progressive and insightful design agency, technically and creatively skilled to translate your brand into its best digital self. Our design and development approach creates impactful, engaging brands and immersive digital experiences that bring you a return on creativity, call with us.
The network services section of Avenger IT Next Generation has three main titles:
- Consulting services and network solutions
- Installation and realization of network projects
- Network support and maintenance services
These services take the form of short and long-term contracts for network support and maintenance and in the form of projects and cases in the field of consulting and the implementation of networks for businesses, institutions, various industries. , medical and educational centers, large commercial office complexes, petrochemicals, factories, small organizations. , Medium and large, and is provided.
